Side-Part Mullet: A Photo Guide
Explore a side-part mullet with notes on the fringe, sides and back. Prepare a barber reference and a photo prompt that keeps your own face familiar.
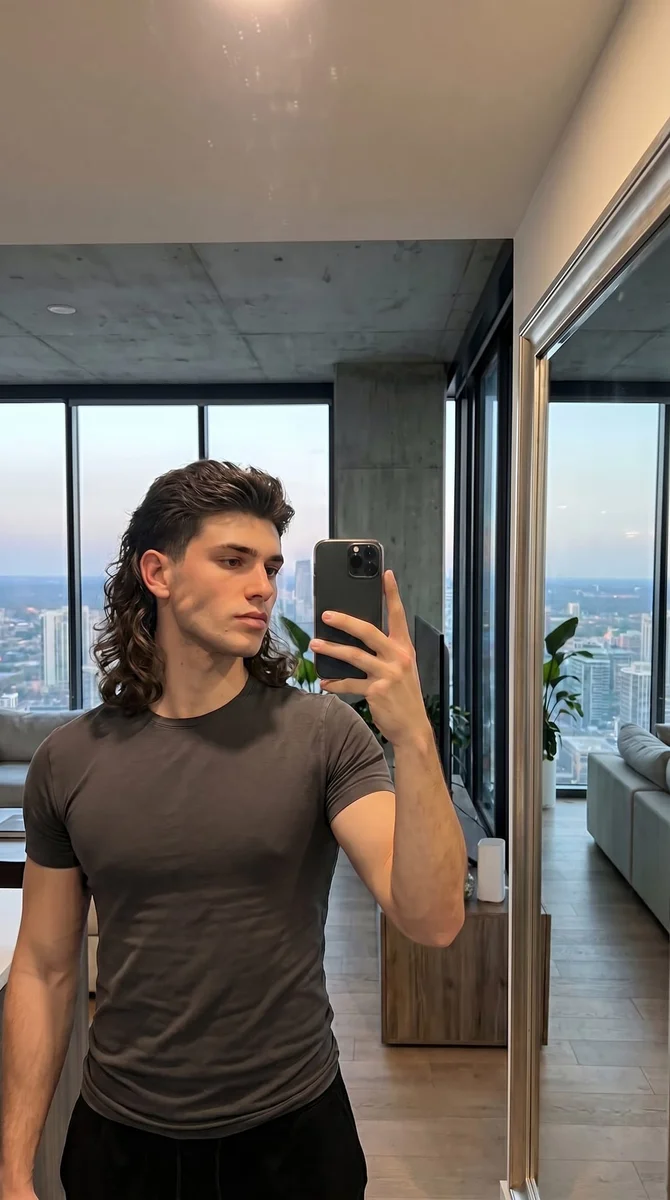
What changes when a mullet has a side part?
A side-part mullet combines an asymmetric direction at the front with a longer section at the back. The part sends the top toward one side, while the rear length keeps the mullet outline. You still need to choose how short the sides should be and how strongly the back should stand out.
Start by separating the direction of the top from the length of the back. A subtle swept front with a short tail is a different request from a pronounced part above a long, feathered back. Gather references that show those details clearly rather than assuming every picture labelled mullet describes the same haircut.
Find a reference that shows the back
A front-facing portrait may show the side part while hiding the feature that makes the haircut a mullet. Choose a second photo from the side or a rear three-quarter angle. Check where the longer hair starts and whether it reaches only the nape or extends farther down the neck.
Uppercut Deluxe’s feathered mullet example is useful for looking at the softer rear outline and the way the top connects to it. It is a separate reference style, not proof that every mullet needs the same finish. Pick the rear length you want, then decide whether your own front should sit to one side.
Decide how much contrast belongs at the sides
Short sides make the longer back more noticeable. Fuller sides create a softer change between the top and the rear. Look at the area around the ears and decide whether you want them clearly exposed. Describe that outline with a reference instead of relying on words such as subtle or dramatic alone.
A fade is another choice, rather than a requirement. If you want one, point out how high it should extend and whether the finish should show skin. Keep that decision separate from the side part, which describes the direction of the top. This helps avoid a result that has the right front but the wrong overall silhouette.
Choose the direction before you shorten the front
Try arranging your existing top toward each side and take a photo in the same light. Notice which direction feels more natural and whether you prefer the forehead mostly open or partly covered. The point is to choose an outline you enjoy, not to follow a rule about which side suits everyone.
Bring that information to your barber along with the reference. Explain whether you want a distinct part line or a looser sweep. A very sharp separation and a soft, textured front can both work within a mullet shape, but they communicate different styling choices. Ask what your starting length allows.
Preview the variation from your original photo
TooExtra already has a classic Mullet template, with a shorter top and sides and a longer back. The side part is an extra instruction, not a separate switch. Add the request explicitly if you use that template, or describe the full cut in Custom Create. Keep the source portrait clear around the ears.
Give me a textured mullet with a soft side part, shorter hair around the ears and a longer feathered back at the nape. Keep my hair color, face, beard, neck and background unchanged.
Use a slight-angle image that includes the back of your neck if you want to judge the rear length. If your source does not show that area, the result has to invent more of the outline. Compare the face, hair color and background as well as the haircut before saving a reference.
Make the appointment conversation specific
Show your chosen top direction, side outline and rear length as separate details. Tell the barber which part of each reference matters. If you bring a generated preview, bring the original too so the real starting length and texture are clear. Ask how the rear section will connect to the crown.
Discuss how you prefer to wear it between appointments. Some references depend on a carefully arranged front, while others show a looser shape. Explain whether you want a neat side part every day or only for particular occasions. This gives the barber more useful information than asking for an exact copy of a styled photo.
Compare the closest alternatives
A wolf cut has a different layered outline and is worth comparing if your main interest is movement around the face and back. A slick back opens the forehead and sends the top backward instead of sideways. A short pixie changes the rear silhouette much more strongly. Compare these as different shapes, not interchangeable names.
Save only the versions that help you make a decision. You might like the side sweep from one picture and the softer back from another. Write those details beside your references so you can explain what you want retained. Start every new edit from the original photo to keep the comparison consistent.
Keep exploring
Low Fade Slick Back: A Photo Guide